Vegetative Propagation: Cuttings of Adriana tomentosa
|
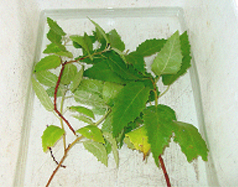
Step 1. The material selected for
cuttings needs to be kept moist and cool to maintain its freshness. Prior
to preparation, the material can benefit from being soaked in clean water
where tissue can re-hydrate and, any loss in, turgidity restored.
|
|
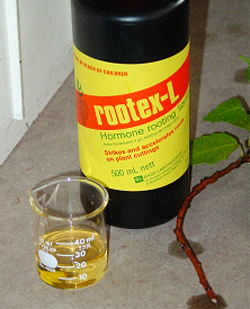
Step 2. Prepare
rooting hormone powder or fresh hormone solution chosen for the
cuttings. Here it is Rootex-L (4g/l indole butyric acid) liquid mixed
1:1 with water.
|
|
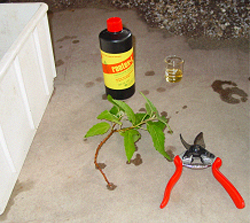
Step 3. The work area and all
equipment used should be pre-cleaned with a sterilant to minimise the
opportunity for pathogen infection. Media should be fresh and/or
pasteurised, if used before. To prevent crushing the plant conducting
vessels when being cut, secateurs need to be sharp.
|
|
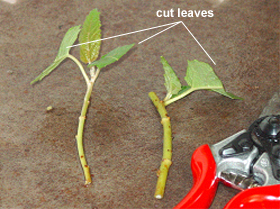
Step 4. Generally, only keep 2-3
of the (still expanding) youngest leaves for tip cuttings. For node
cuttings, 1-3 of the mature leaves are kept, but their area reduced by
˝ to 2/3, or some times more depending on their size.
|
|
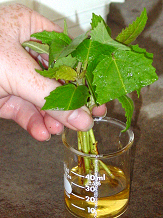
Step 5a. After preparation the
cuttings are returned to a
water bath until all the material
is made ready or until sufficient is available to do a planting.
A manageable bundle is gathered, the ends of the cuttings aligned
and dipped in the solution (for about 10 seconds) to a depth of 10-15
mm. The duration in the solution depends on the tenderness of the
material (the more woody, the longer the immersion). Cuttings are best
individually dipped into hormone powder and any excess powder
tapped free.

Step 5b.
The cut ends of those dipped
in solution are allowed to dry for a few minutes before planting.
|
|

Step 6. A pointed, non- porous
‘dibble’ stick is used to
punch holes into the
moistened potting media (prepared earlier), to between half to
two thirds the depth of the grow tube or tray cell. This media is
without added fertiliser.
|
|

Step 7. One cutting (rarely more)
is slipped into the hole in
the media, which is then lightly compacted around it. The tubes are
watered thoroughly, to eliminate air spaces around the base of
the cuttings that can cause wilting. Labelling of cuttings with name and
date eliminates confusion among closely related species and allows for
calculation of the approximate
time taken for cuttings to strike (i.e.
produce roots).
|
|
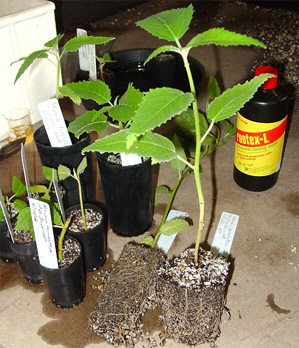
Step 8a.The end product of
successful vegetative propagation - a well develop and healthy root
system supporting a healthy and vigorously growing shoot. Plants at this
stage are ready for potting up into larger pots or can be held in large
numbers while occupying a relatively
small area, for when they are later needed.

Step 8b. A cutting rooted in a
50mm diameter x 70 mm deep tube and transplanted into a 75mm diameter x
100mm deep tube. Note the excellent vertical and horizontal, lateral
root development.
|
Gio.
W. Fichera
|

